In a previous article About Email and Privacy, we discussed how email systems work, how emails are intercepted, analyzed header data, and briefly outlined ways to protect our email privacy. On this occasion, we wish to share with you how to use GnuPG for encrypting the content of an email.
When sharing information via email with friends or colleagues, it is not uncommon to include sensitive data such as email addresses, usernames, passwords, or other confidential information. To safeguard this sensitive content, we can utilize GnuPG. GnuPG is employed to encrypt the body or message of an email.
By employing this method, the exchange of information requires prior consent between the sender and recipient through the exchange of a “public key”, thereby ensuring that the message is much more secure in terms of confidentiality.
In this tutorial, we will utilize software GnuPG integrated with Thunderbird. The author prefers Thunderbird as a mail client because it is available on various operating systems. Additionally, Thunderbird provides several features/extensions, such as Enigmail, which enables us to perform encryption, decryption, and provide PGP signatures.
The following tools are required or used by the author for this guide:
- Linux Operating System
- GnuPG
- Mozilla Thunderbird
- Enigmail
Before proceeding, I assume that you have successfully installed GnuPG, Thunderbird, and the Enigmail plugin on your operating system.
Creating a PGP Key with GnuPG
After downloading GnuPG and installing it, we can generate a PGP key by running the command: gpg --gen-key. You will then have several options for your generated key, including key type, key size, how long the key is valid, and passphrase key for your PGP key.
1Please select what kind of key you want:
2 (1) RSA and RSA (default)
3 (2) DSA and Elgamal
4 (3) DSA (sign only)
5 (4) RSA (sign only)
6Your selection? 1
First, we select option number 1 (RSA and RSA) which enables us to perform both encryption and signature of messages.
1RSA keys may be between 1024 and 4096 bits long.
2What keysize do you want? (2048) 2048
3Requested keysize is 2048 bits
Next, we choose the desired keysize. By default, the program GPG uses a value of 2048. Enter 2048 and press enter.
1Please specify how long the key should be valid.
2 0 = key does not expire
3 <n> = key expires in n days
4 <n>w = key expires in n weeks
5 <n>m = key expires in n months
6 <n>y = key expires in n years
7Key is valid for? (0) 1y
8Key expires at Sun 27 Jul 2013 05:55:36 PM WIT
9Is this correct? (y/N) y
Then, we determine how long the key is valid. In this example, I made the key valid for 1 year. Enter 1y and press enter.
 1GnuPG needs to construct a user ID to identify your key.
 2
 3Real name: Tutorial PGP
 4Email address: [email protected]
 5Comment: Untuk contoh tutor PGP
 6You selected this USER-ID:
 7 "Tutorial PGP (Untuk contoh tutor PGP) <[email protected]>"
 8
 9Change (N)ame, (C)omment, (E)mail or (O)kay/(Q)uit? O
10You need a Passpharse to protect your secret key.
The next step is to provide a user ID to identify the key we are creating. The user ID includes your original name, email address, and comment. Fill in all the forms and then type O and press enter.
After that, a popup will appear with a form to fill in the passphrase key, as shown in the picture below:
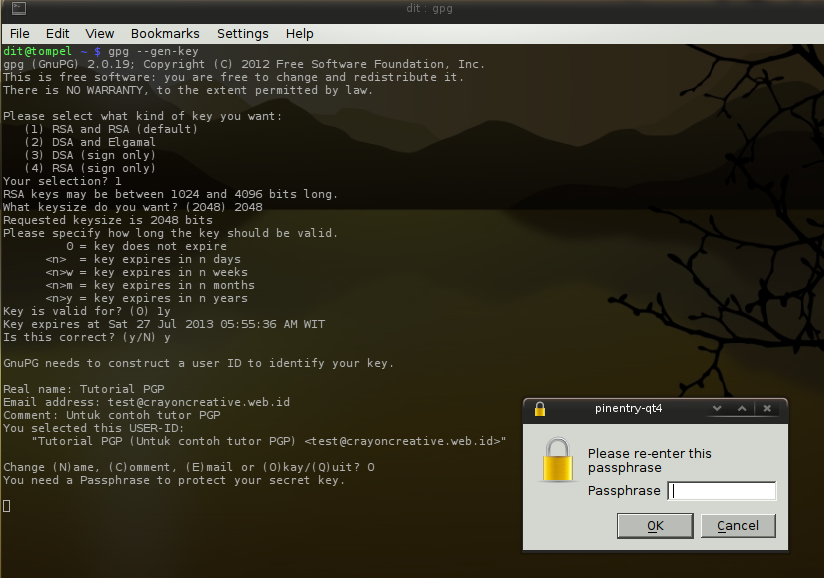
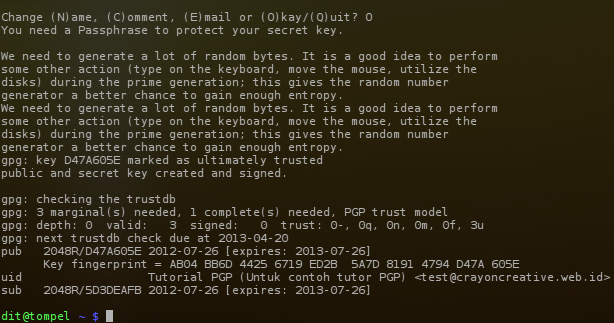
Fill in the passphrase key which will serve as a password for using your PGP Key and decrypting messages. Press the Ok button, then wait for a few seconds, and you will see a summary key with information such as expiration date, owner’s name, and others. As shown on the picture, my PGP public key is D47A605E.
Using PGP in Thunderbird with Enigmail
Open your Thunderbird program, select option OpenPGP > Key Management. Then, a list of keys available on our system will appear, as shown in the picture below:
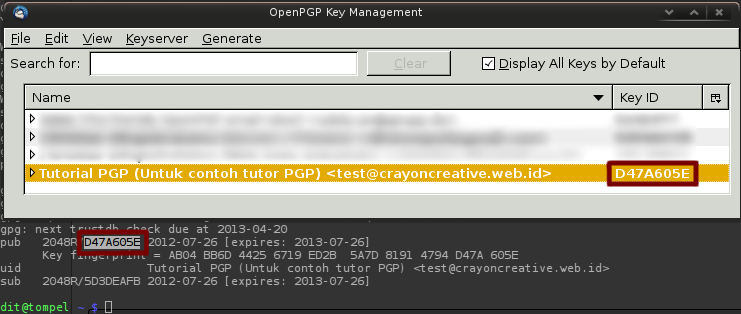
Make sure your public key ID on OpenPGP is the same as what you just created. Then, to perform testing, we can send an email to [email protected] (PGP Email Robot) with our public key attached. The way to do it is by selecting menu OpenPGP > Attach Public Key.
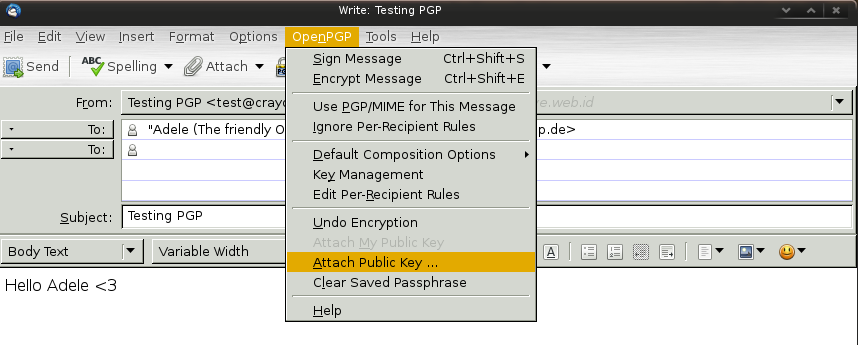
Then, a popup list PGP key will appear. Select the PGP key according to the email we use (D47A605E) by checking the box on the left side of Account / User ID.

Send your message, and then after a few seconds you will receive an email reply from Adele:
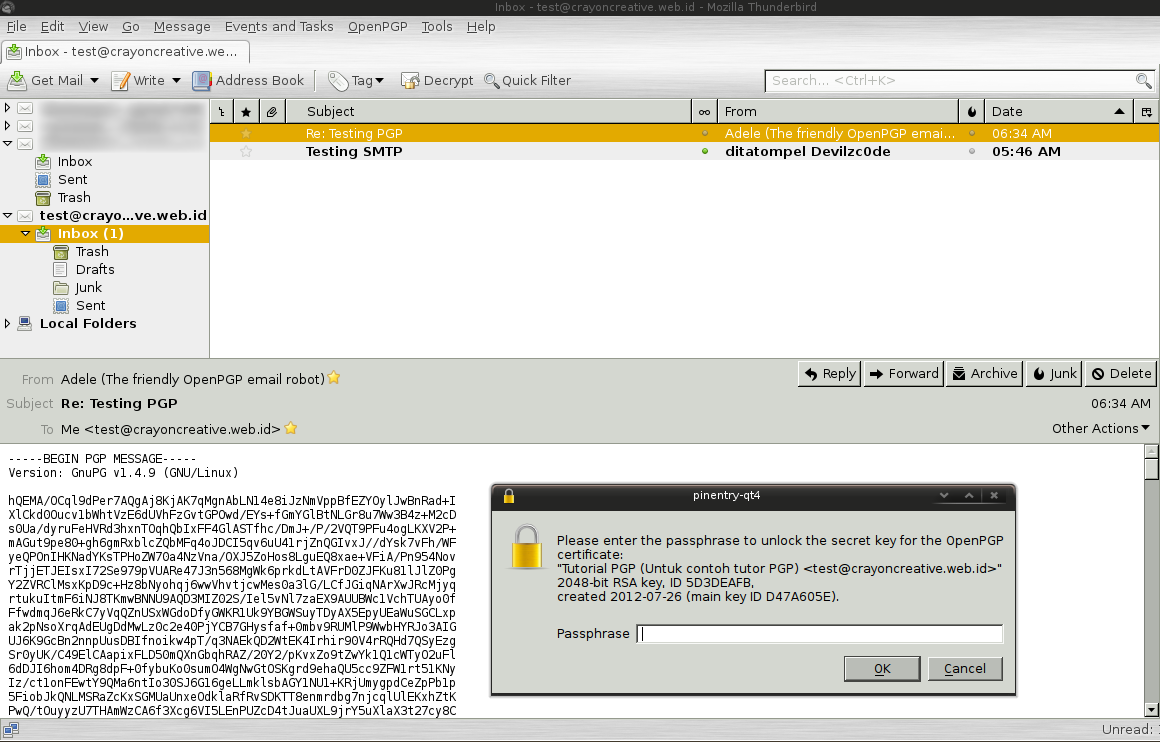
Enter your passphrase key PGP key to find out the contents of the message. It should appear like the picture below:
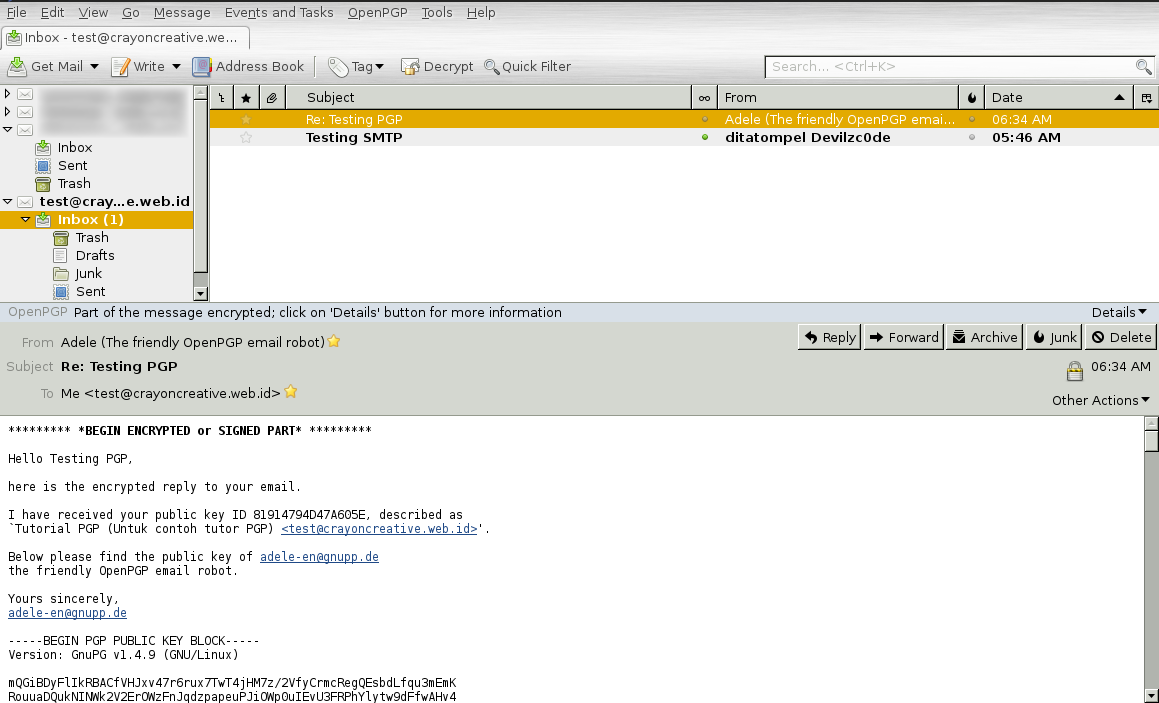
After successfully emailing with the “Robot”, it’s time to try emailing with a real person. (Find someone who is already familiar with using PGP and exchange Public Keys 1 same as each other) In the OpenPGP menu, check the options Sign Message and Encrypt Message. (Make sure the pencil and key icons on the bottom right are yellow).
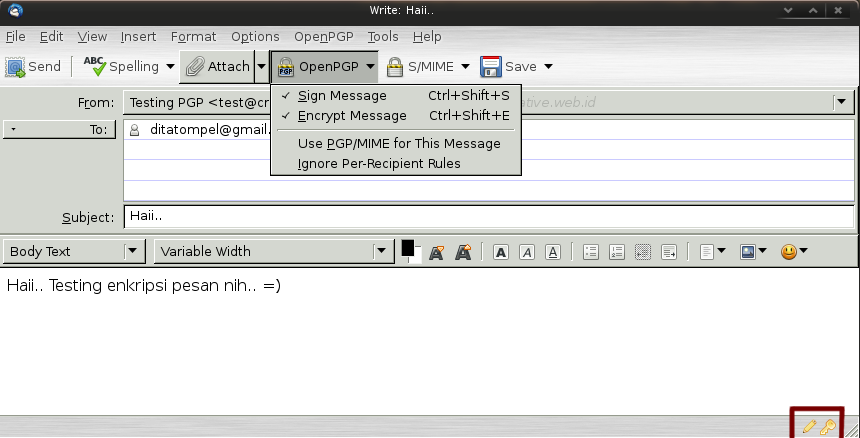
Send the message, and then only someone who has a complete PGP key and knows their passphrase key- can read the message.
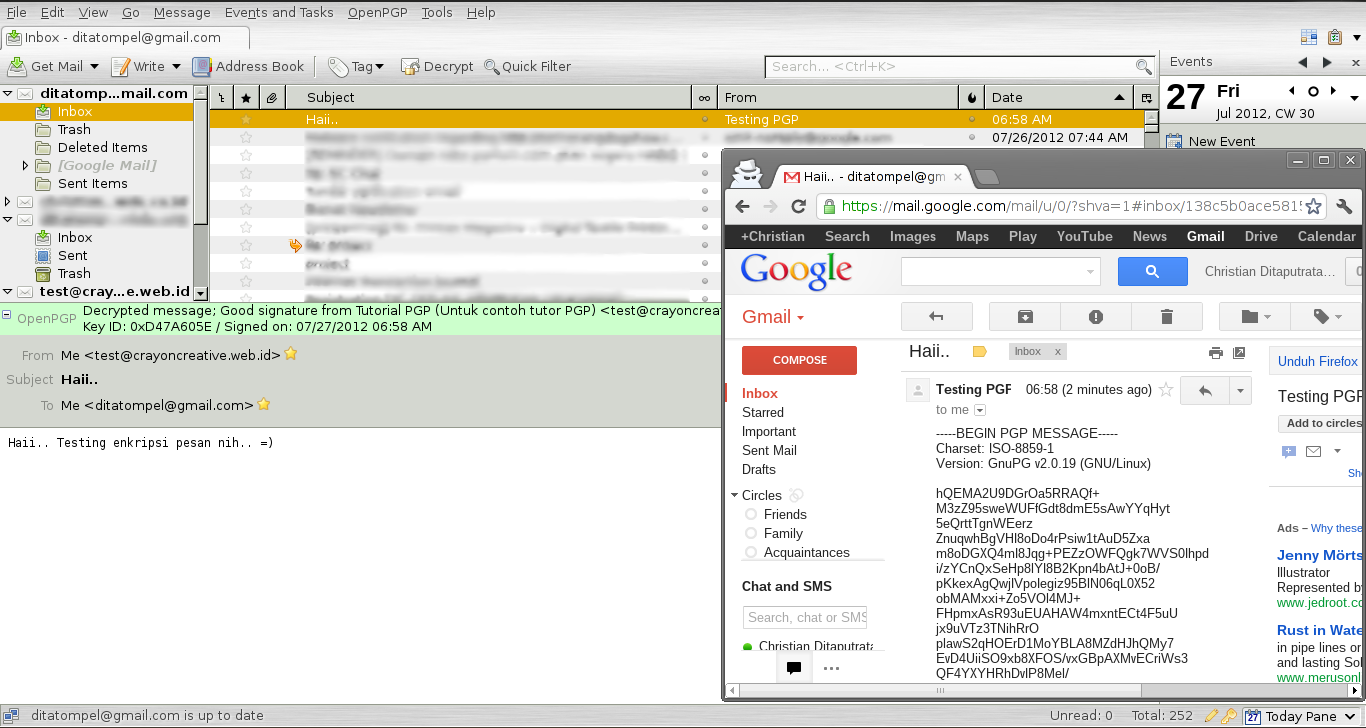
I hope this guide helps you who want to pay more attention to privacy when exchanging messages through email.
Sources:
