For System Administrators, using SSH instead of Telnet is likely a daily routine when accessing Linux/Unix-based systems. Although the password transmitted to the server has been encrypted and no longer appears as plaintext, the default installation of OpenSSH is considered somewhat insecure.
This time, I’d like to share some common tricks for tightening up SSH access. This includes disabling SSH access for the root user, utilizing public and private keys, and even modifying the default port. Additionally, I’ll be sharing a few tips to make server management easier and simpler.
To participate in this discussion, you should have:
- A client PC with Linux running KDE 4.8.
- A remote SSH server (Remote PC) with an IP address of 202.150.169.245.
- Basic understanding of Linux command-line interfaces, such as
chmod,ssh,groupadd, anduseradd. - The ability to use text editors like
vi/vim/nano/pico, etc.
Disabling Root Access via SSH
The “root” user is undoubtedly present on Unix/Unix-like systems. If we don’t disable this user, it will make it easier for attackers to perform brute-force attacks against the root account.
Before disabling root access, we need to create a new user with the right to use the SSH service and add them to the sudoers list.
- Access the SSH server using the “root” user first.
1ssh [email protected]
- Once logged in to the SSH server, create a new user and group. (You can refer to
man useraddfor more information)
1groupadd ditatompel
2useradd -s /bin/bash -d /home/ditatompel -g ditatompel -G root -m ditatompel
- Set the password for this new user with the command
passwd ditatompel.

- Then, add the “ditatompel” user to the sudoers list. Edit the
/etc/sudoersfile and add the following permission:
1ditatompel ALL=(ALL) ALL
- Next, edit the
/etc/ssh/sshd_configfile and add/edit the following configuration:
1PermitRootLogin no
2AllowUsers ditatompel
- Restart the SSH daemon:
1service sshd restart #(For CentOS, etc.)
2/etc/init.d/ssh restart #(for Debian)
3/etc/rc.d/sshd restart #(FreeBSD, Arch, Gentoo, etc.)
Important: After restarting, ensure that any currently connected SSH sessions do not get terminated or closed so you can still access and edit the configuration if there’s an error.
- Try accessing the SSH server using the new user, which is “ditatompel”.
1ssh [email protected]
Changing the Default SSH Port (Optional)
Changing the default SSH port (22) can help prevent brute-force attacks that simply grab scripts from the internet since most brute-force SSH scripts default to port 22 for their attack attempts.
NOTE: If your server’s firewall is active, you’ll need to open access to the new port, for example if you’re using iptables:
1iptables -A INPUT -p tcp --dport 1337 -j ACCEPT
2iptables save
3service iptables restart
- Remember not to close any existing SSH connections that are already connected to avoid unwanted issues.
Next, to change the port, edit the /etc/ssh/sshd_config file and add/edit the following configuration:
1Port 1337
Then, restart the SSH daemon.
As we can see, the SSH daemon is now listening on port 1337. To confirm this, you can use the netstat command.
1netstat -plnt
Finally, always test again to ensure that your server can be accessed.
Using Public and Private Keys
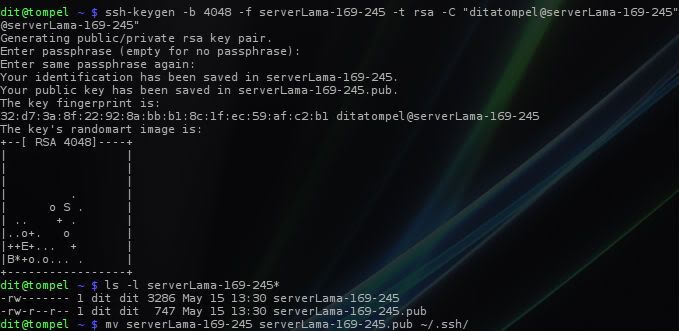
- First, create a keypair for SSH client and SSH server using
ssh-keygen.
1ssh-keygen -b 4048 -f oldServer-169-245 -t rsa -C "ditatompel@oldServer-169-245"
This will generate two files: oldServer-169-245 (private key) and oldServer-169-245.pub (public key). The former is our private key, while the latter is our public key that we’ll place on our server.
- Move these two files to the
~/.sshdirectory and change their permissions to600.
1mv oldServer-169-245 oldServer-169-245.pub ~/.ssh/
2find ~/.ssh/ -type f -exec chmod 600 {} +
- On the server, create a hidden directory
.sshin the user’s home directory (ditatompel) and change its permissions to700.
1mkdir ~/.ssh; chmod 700 ~/.ssh
- Copy our public key to the remote PC (SSH Server) with the name
authorized_keysand file permission600. (You can usesftporscpto copy the file):
Example:
1cd ~/.ssh
2sftp -P 1337 [email protected]
1sftp> put oldServer-169-245.pub /home/ditatompel/.ssh/authorized_keys
2sftp> chmod 600 /home/ditatompel/.ssh/authorized_keys

- After that, edit the file
/etc/ssh/sshd_configand add/configure the following to prevent users from accessing shells even if they know the password, and force them to use private keys:
1PasswordAuthentication no
- Restart SSH daemon and try again with the command:
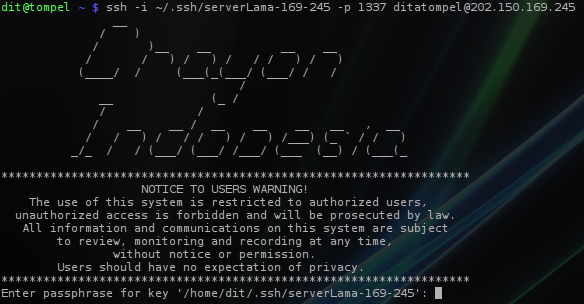
1ssh -i ~/.ssh/oldServer-169-245 -p 1337 [email protected]
Managing Server Using FISH Protocol
This is my favorite part, and I think there might be some people who don’t know about it yet.
FISH (Files transferred over Shell protocol) is a network protocol that uses Secure Shell (SSH) or Remote Shell (RSH) to transfer files between computers. We use Dolphin, which is already built-in with KDE. In addition to Dolphin, KDE users can also use Konqueror for the FISH protocol. For Gnome users, you can also use Nautilus with a third-party plugin.
To do this, simply click on the breadcrumb navigation directory and type {protocol}{user}@{server}:{port}/{directory} and press Enter.
Example :
1fish://[email protected]:1337/var/www/path/to/directory/you/want/to/access/
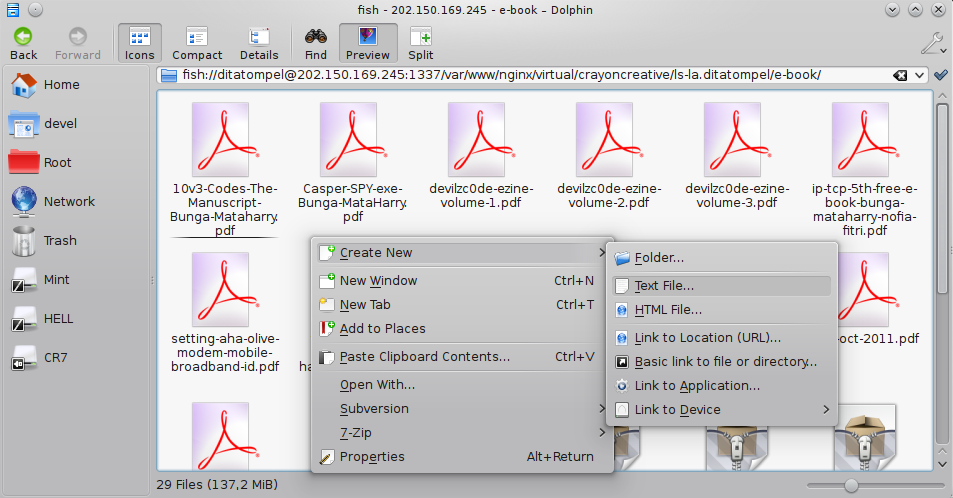
After that, we will be prompted to enter our SSH password. However, there is a problem that FISH protocol on Dolphin/Konqueror does not know whether we are using public and private keys to access the server.
So, we can take advantage of the ssh config feature (located in ~/.ssh/config for per-user configuration or /etc/ssh/sshd_config for system-wide).
For per-user configuration, there is usually no file ~/.ssh/config, so we need to create it first by adding a configuration IdentityFile so that the program knows that we must use our private key SSH:
1IdentityFile /home/dit/.ssh/oldServer-169-245
What if we have many servers and many private keys for each server? Let’s continue reading.
Configuring ~/.ssh/config
For system administrators responsible for managing numerous servers with diverse login access requirements, recalling port numbers, passwords, users, and so on can be a daunting task. Not to mention keeping track of application access on each server. Therefore, we can utilize the SSH config feature that enables us to access the shell by simply remembering the IP address and passphrase of each server.
Here is an example configuration for multi-server identities:
 1Host 202.150.169.245
 2Hostname 202.150.169.245
 3        User ditatompel
 4        Port 1337
 5        IdentityFile /home/dit/.ssh/oldServer-169-245
 6
 7Host xxx.xx.xx.xxx
 8HostName xxx.xx.xx.xxx
 9        User ditakeren
10        Port 12345
11        IdentityFile /home/dit/.ssh/blahblah1
12
13Host xxx.xxx.xxx.xx
14Hostname xxx.xxx.xxx.xx
15        User ditacakep
16        Port 23213
17        IdentityFile /home/dit/.ssh/blahblah2
18
19# dan seterusnya
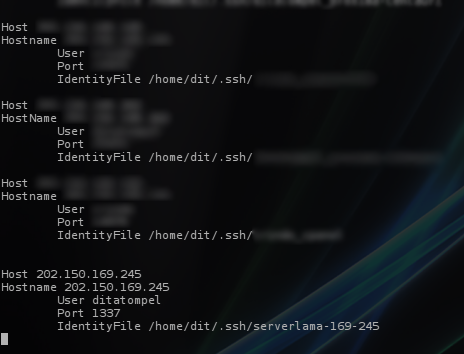
With this, we can use the SSH command with:
1ssh 202.150.169.245
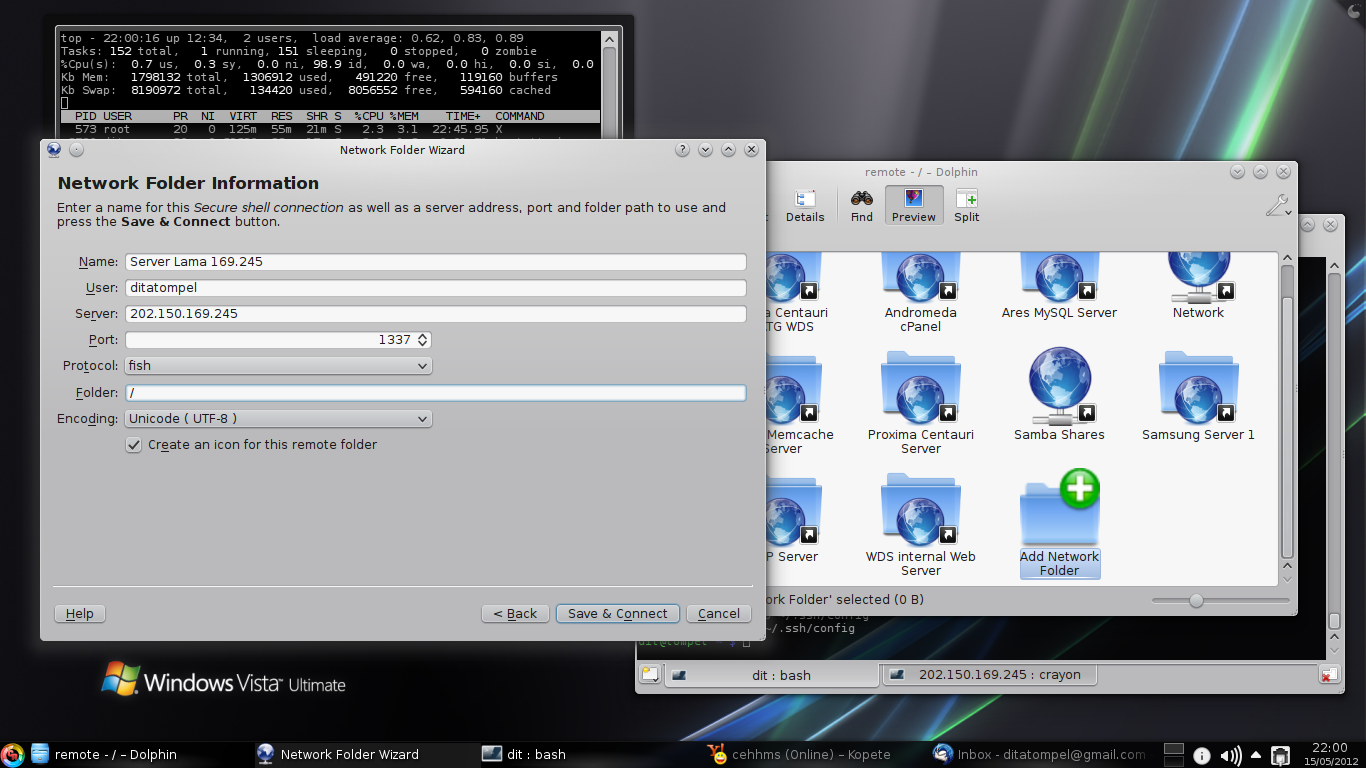
or by adding it to a network directory by accessing Network > Add Network directory, and filling in the necessary remote PC (SSH server) information.
That’s all from me for now; please feel free to add or correct as you see fit, I would greatly appreciate it.
References:

