Wakapi is a minimalist, self-hosted WakaTime - compatible backend for coding statistics. It’s cross-platform (Windows, macOS, Linux) and can be self-hosted to your local computer or your own server, so your data is really yours. This article will guide you how to run Wakapi on Linux operating system.
Introduction
As someone who extensively use computers on a daily basis, particularly performing server maintenance and coding, I’m always curious about what I’ve been working on, which projects consume the most of my time, and which programming languages I use the most.
Over the past year, I’ve tried several services, from Activity Watch, CodeStats to WakaTime.
With Activity Watch, while the backend can be installed on a local or remote server, I found it to be somewhat resource-intensive. While CodeStats and WakaTime were excellent, the coding statistics data was sent to their servers; this aspect was a concern for me.
A few days ago, I found a solution for that problem: Wakapi. It’s an API endpoint compatible with the WakaTime client, and it can be self-hosted.
The Wakapi server is built using the Go programming language and can be run on various operating systems, including Windows, macOS (both ARM and x86_64), and Linux (both ARM and x86_64). In this article, I want to share my experience installing and running Wakapi on a Linux server.
Server Installation
Before we begin, there are some prerequisites to meet in order to follow this article:
- Comfortable using Linux terminal
- A WakaTime client already installed and working properly
- A Linux server / laptop / PC
- A web server (for this article, I’m using Nginx. Optional, but recommended if Wakapi will be accessed publicly)
There are a few ways to run your own Wakapi server:
- Using precompiled binary
- Using Docker
- Compiling from source code
Since Go is already installed on my server, I’ll be using the third option here — compiling directly from source code.
System Preparation & Compiling Executable Binary
First, prepare the system by creating a new system user:
1sudo useradd -r -m --system -d /opt/wakapi -s /bin/bash wakapi
Clone the mutey/wakapi repository and compile the executable binary:
1# clone repo
2git clone https://github.com/muety/wakapi.git
3
4# build executable binary
5cd wakapi
6go build -o wakapi
Wakapi Configuration Setup
After the compilation process is complete, move the executable binary to the wakapi’s $HOME directory that we created earlier:
1sudo mv wakapi /opt/wakapi/
Download a sample configuration:
1sudo curl -o /opt/wakapi/wakapi.yml https://raw.githubusercontent.com/muety/wakapi/master/config.default.yml
2# Change file ownership to the wakapi user
3sudo chown wakapi:wakapi /opt/wakapi/wakapi.yml /opt/wakapi/wakapi
Then, edit the /opt/wakapi/wakapi.yml configuration file as needed. For instance, if I’m using the subdomain wakapi.example.com with Nginx as a reverse proxy for Wakapi, I’d set the listen_ipv4 to 127.0.0.1 and public_url to https://wakapi.example.com. Adjust other configurations such as database connection, SMTP email, etc. if you need to.
Creating a Systemd Service
Creating Systemd service making it easy to start or restart the Wakapi service.
Create /etc/systemd/system/wakapi.service and adapt from these following example configuration:
 1[Unit]
 2Description=Wakatime Wakapi
 3StartLimitIntervalSec=400
 4StartLimitBurst=3
 5
 6# Optional, and if you using MySQL or PostgreSQL
 7Requires=mysql.service
 8After=mysql.service
 9
10[Service]
11Type=simple
12
13WorkingDirectory=/opt/wakapi
14ExecStart=/opt/wakapi/wakapi -config /opt/wakapi/wakapi.yml
15
16User=wakapi
17Group=wakapi
18RuntimeDirectory=wakapi # creates /run/wakapi, useful to place your socket file there
19
20Restart=on-failure
21RestartSec=90
22
23# Security hardening
24PrivateTmp=true
25PrivateUsers=true
26NoNewPrivileges=true
27ProtectSystem=full
28ProtectHome=true
29ProtectKernelTunables=true
30ProtectKernelModules=true
31ProtectKernelLogs=true
32ProtectControlGroups=true
33PrivateDevices=true
34CapabilityBoundingSet=CAP_NET_BIND_SERVICE
35ProtectClock=true
36RestrictSUIDSGID=true
37ProtectHostname=true
38ProtectProc=invisible
39
40[Install]
41WantedBy=multi-user.target
Then, reload and start the Wakapi service:
1sudo systemctl daemon-reload
2sudo systemctl enable wakapi.service --now
3
4# Check if the service is running properly
5systemctl status wakapi.service
If everything is running smoothly, proceed to the next step for Nginx reverse proxy configuration.
Nginx Reverse Proxy
For the Nginx configuration, no special adjustments are needed. You can simply use a standard reverse proxy configuration. For example:
 1server {
 2    listen 80;
 3    server_name wakapi.example.com;
 4    root /opt/wakapi;
 5    access_log  off;
 6    location /.well-known/acme-challenge/ { allow all; }
 7    location / { return 301 https://$host$request_uri; }
 8}
 9
10server {
11    listen 443 ssl http2;
12    server_name wakapi.example.com;
13    access_log  off;
14
15    ssl_certificate     /path/to/fullchain.pem;
16    ssl_certificate_key /path/to/privkey.pem;
17
18    # bla bla bla
19
20    location / {
21        proxy_set_header X-Forwarded-For $proxy_add_x_forwarded_for;
22        proxy_set_header X-Forwarded-Proto $scheme;
23        proxy_set_header X-Real-IP $remote_addr;
24        proxy_set_header Host $http_host;
25        proxy_pass http://127.0.0.1:3000;
26    }
27}
Adjust the proxy_pass to match with the listen_ipv4 and port configurations from your /opt/wakapi/wakapi.yml.
Now, try accessing your Wakapi server and register for an account. You’ll receive an API key that you’ll need to set in your WakaTime client.
WakaTime Client Configuration
Your server is ready to accept your “heartbeat”, configure your WakaTime client to connect to your self-hosted Wakapi instance.
To do so, modify the api_url and api_key in your .wakatime.cfg to match with your server configuration. For example:
1[settings]
2api_url = https://wakapi.example.com/api
3api_key = Your-API-Key-From-Your-Wakapi-Server
Start coding and check your coding activity on the Wakapi Dashboard.
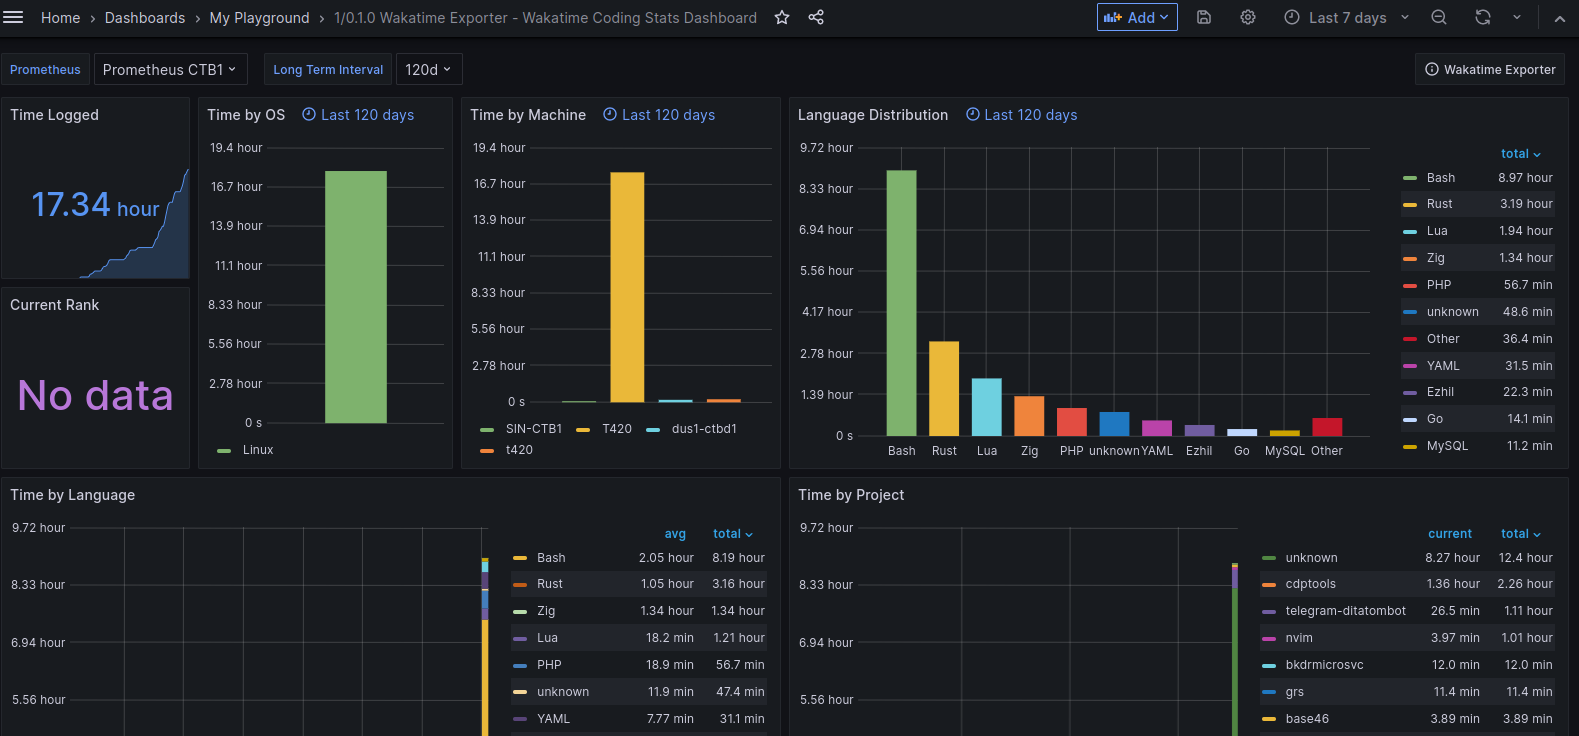
Wakapi also have a feature to export metrics to Prometheus format and then visualize them with Grafana.
You can also integrate it with GitHub Readme Stats to display your coding activity on your GitHub profile page.

