On this occasion I would like to share how to configure the PHPMyAdmin application so that it can be used to manage multiple MySQL database servers (remotely).
When writing this article, the author used PHPMyAdmin Version 3.5.2.1 with Apache Web Server running on Linux OS. Meanwhile, the remote MySQL database server uses version 5.x. Previously, the author assumed that you were able to run PHPMyAdmin on your computer.
Remote MySQL Server
On the remote MySQL server, create a new database user that we will use to access the server from our PC or personal computer.
First, log in to MySQL and create a new user:
1CREATE USER 'user_name'@'ip_address' IDENTIFIED BY 'password';
Where:
user_nameis the database username that we use to log in to the database server.ip_addressis the IP address or hostname where PHPMyAdmin is installed.passwordis the password to log in to the database server.
After that, grant the required permissions to the user with the GRANT command:
1GRANT ALL PRIVILEGES ON *.* TO 'user_name'@'ip_address';
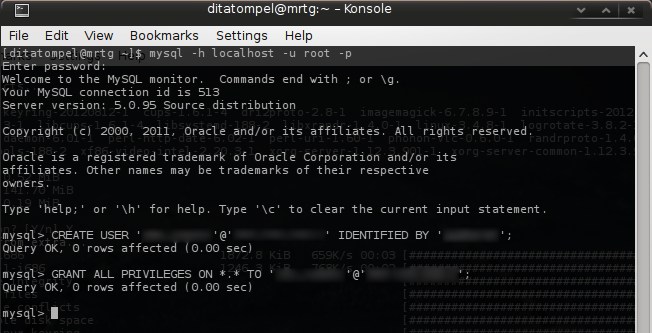
Where:
ALL PRIVILEGESmeans all permissions that the user has, except for the GRANT option to other users.*.*means all databases and tables. The first asterisk represents the database name, and the second asterisk represents the table in the database.'user_name'@'ip_address'is the username that we created previously.
For example, if you only want SELECT permission, and UPDATE permissions for the tbl_transaction table in the db_website database for user finance with IP address 192.169.1.1, use:
1GRANT SELECT, UPDATE ON db_website.tbl_transaction TO 'finance'@'192.169.1.1';
Then, finally, don’t forget to FLUSH PRIVILEGES.
1FLUSH PRIVILEGES;
PHPMyAdmin Client
Find where the PHPMyAdmin application is located. In this tutorial, the location is /usr/share/webapps/phpmyadmin. Edit the config.inc.php file in that directory and add the following configuration:
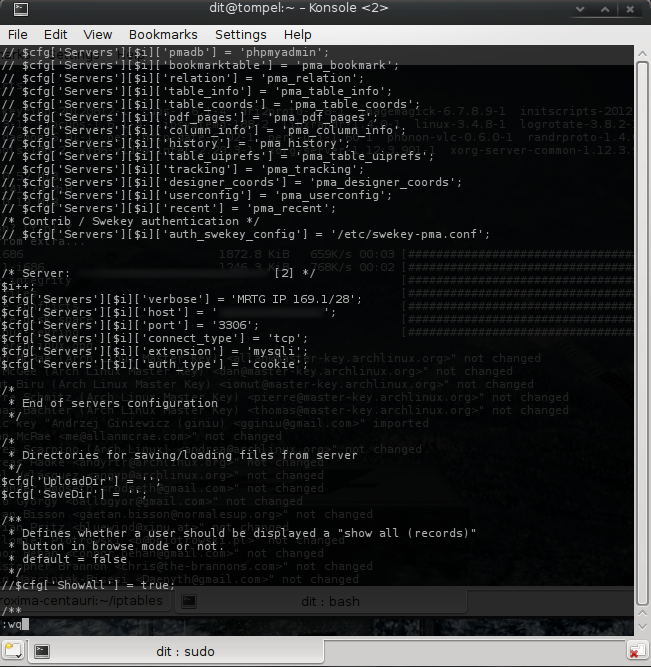
1$i++;
2$cfg['Servers'][$i]['verbose'] = 'MRTG IP 169.1/28';
3$cfg['Servers'][$i]['host'] = '192.168.1.5';
4$cfg['Servers'][$i]['port'] = '3306';
5$cfg['Servers'][$i]['connect_type'] = 'tcp';
6$cfg['Servers'][$i]['extension'] = 'mysqli';
7$cfg['Servers'][$i]['auth_type'] = 'cookie';
Where :
verboseis the server name that will appear in PHPMyAdmin.hostis the IP address or domain name of the remote MySQL database server.portis the port number of the remote MySQL database server (default3306).connect_typeis the connection type used. There are two options:socketandtcp. We usetcpbecause the MySQL server is not on the same server as the PHPMyAdmin server that is currently running.extensionis the PHP MySQL extension used for the above connection.auth_typeis the authentication mode used for login.
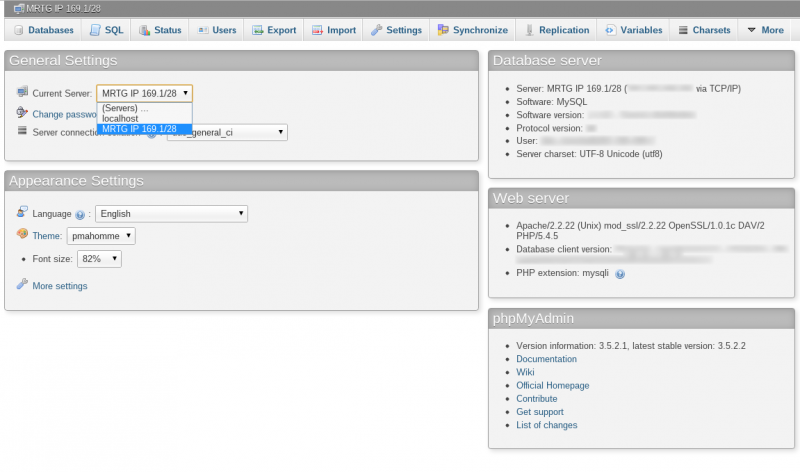
After that, try opening the PHPMyAdmin page in a web browser. Then additional options will appear on the login page, as follows:
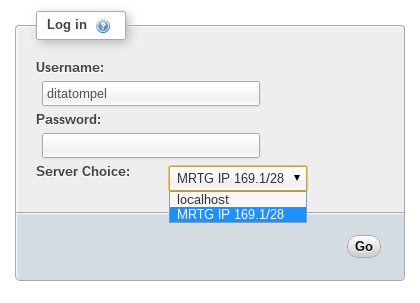
Then, simply log in with your username and password according to the server choice.
With this feature, you can perform or utilize synchronization from a remote server to a local server or vice versa:
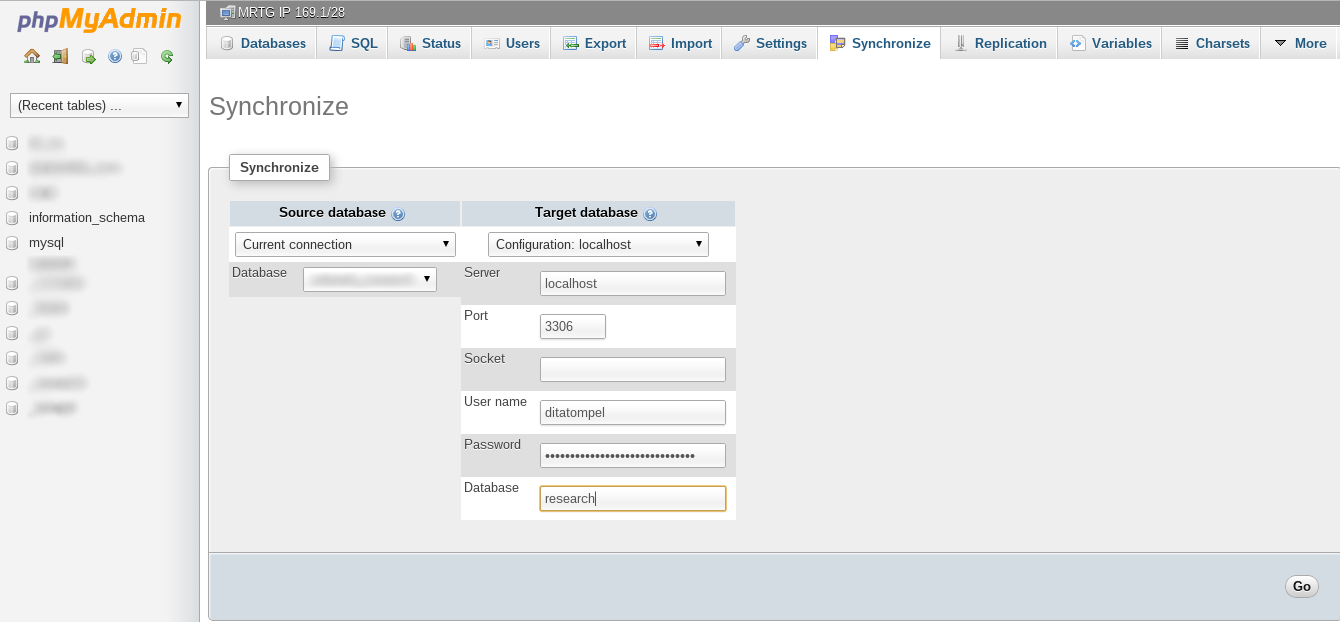
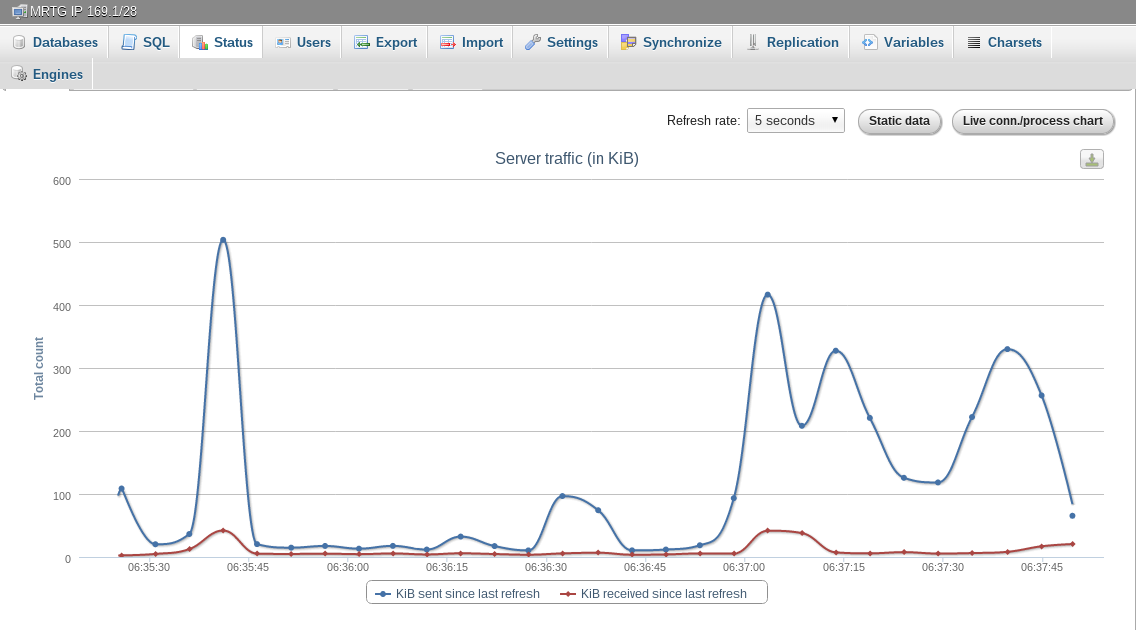
Or monitor remote databases from your personal computer, even though PHPMyAdmin is not installed on the remote MySQL server.
Hope it’s useful.
