

After series of my IPsec VPN article. Today, I want to share how to set up WireGuard VPN server. Because WireGuard use UDP instead of TCP, it’s extremely fast compared to L2TP/xAuth and IKEv2 VPN (my previous IPsec VPN articles).
Prerequisites
- A VPS with Public IP address.
- Comfortable with Linux command-line.
- Basic knowledge of IPv4 subnetting (to be honest, I’m not familiar with IPv6 subnetting, so this article is for IPv4 only).
It doesn’t matter which cloud provider you choose. In this article, I will use DigitalOcean (referral link) Droplet for my WireGuard VPN server (You can get your free $200 in credit over 60 days by registering using my referral code).
NOTE: You should know that cloud providers usually charge extra amount of
$for every GB of overuse bandwidth. So, know your needs and your limits!
VPS server I use for this article will be destroyed when this article is published.
Deploying your new VPS (DigitalOcean Droplet, optional)
If you already have your own VPS running, you can skip this step and go to next step: “Set up your WireGuard Server”.
- Go to your project and Create new Droplet.
- Choose droplet region closest to you to avoid any potential network latency. In this example, I’ll pick Frankfurt datacenter.
- Select your Droplet OS, for this article, I’ll use Ubuntu
22.04 LTS. - Select your Droplet size. I’ll start with basic, 1 CPU with 1GB of RAM and 1TB network transfer ($6/month).
Adapt the VPS size to fit with your need to avoid extra charge of overuse bandwidth (1TB monthly transfer is enough for me).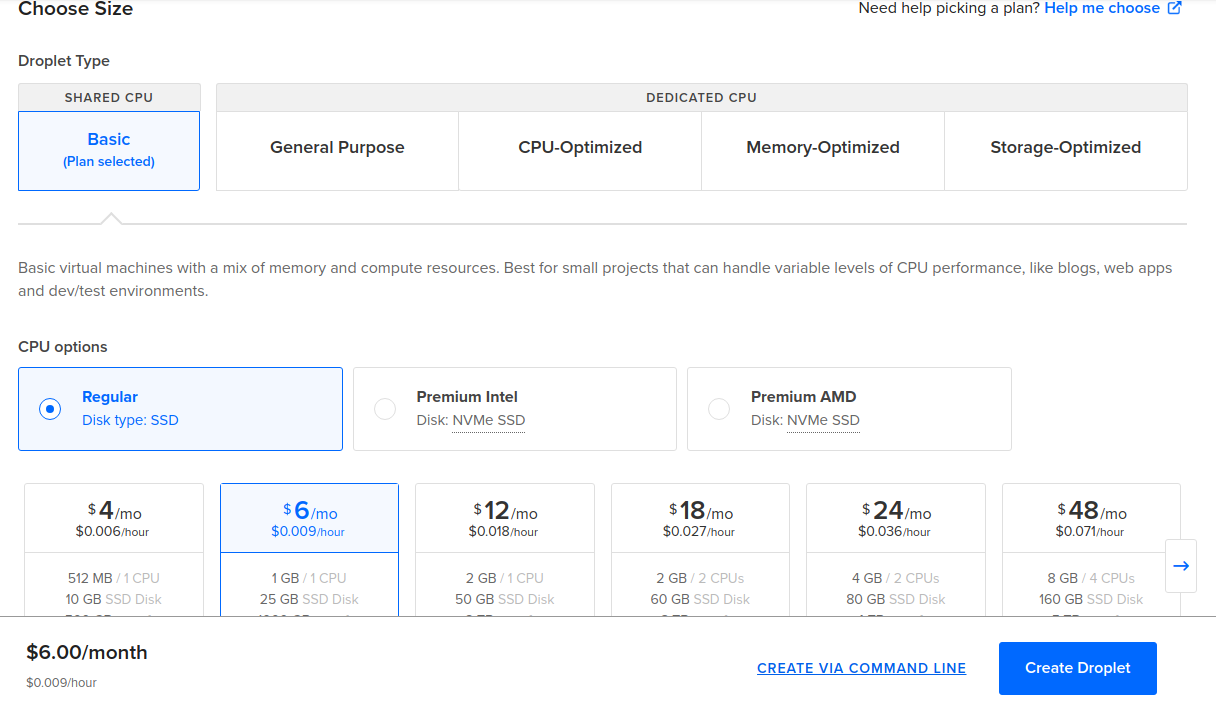
- Set up your preferred authentication method, I prefer using SSH public and private key rather than password auth.
- Set any other options as default. I’m sure you don’t need backup and managed database options for this setup.

WireGuard did NOT need high disk I/O, so NVMe disk is NOT necessary.
Set up your WireGuard Server
IMPORTANT NOTE: Since I’m not familiar with IPv6 subnetting, I’ll only use IPv4.
Once your VPS ready and running, it’s recommended to update your OS first using apt update && apt upgrade command and reboot your VPS.
If you want to manage WireGuard peers (client) on a single server easily, you might be interested to read “Installing WireGuard-UI to Manage Your WireGuard VPN Server”.
Install WireGuard
Install WireGuard using sudo apt install wireguard command. Once WireGuard is installed, we need to generate private and public key pairs for our WireGuard server.
Tips: You can create vanity public key address for WireGuard using tool like warner/wireguard-vanity-address.
Generate Private Key
You can use wg genkey command to generate your private key. Place your private key to somewhere save, for example: /etc/wireguard/do_private.key.
1wg genkey | sudo tee /etc/wireguard/do_private.key
Write down the output, we’ll need that later to generate our WireGuard Server public key. Example of my WireGuard server private key:
uO0GDXBc+ZH5QsLmf+qRyCtFmUV1coadJvQp8iM0mEg=
Change /etc/wireguard/do_private.key file permission with sudo chmod 600 /etc/wireguard/do_private.key.
Generate Public Key
Now, generate server public key from previously generated private key:
1sudo cat /etc/wireguard/do_private.key | wg pubkey | sudo tee /etc/wireguard/do_public.key
Write down the output, we’ll need that later to configure WireGuard connection for peers (clients). Example of my WireGuard server public key:
7c023YtKepRPNNKfGsP5f2H2VtfPvVptn8Hn6jjmaz8=
Configuring WireGuard Server
Before configuring your WireGuard server, you need to decide your private network IP range for your WireGuard connection (tunnel interface). You should choose valid private network IP ranges. For example:
- Between
10.0.0.0-10.255.255.255(10.0.0.0/8) - Between
172.16.0.0-172.31.255.255(172.16.0.0/12) - Between
192.168.0.0-192.168.255.255(192.168.0.0/16)
Tips: Avoid using your current used private IP ranges and commonly used private IP range. For example: Docker uses
172.17.0.0/16IP range by default. If you use Docker, you must use another IP range for your WireGuard IP range to avoid conflict.
In this article, I only use IPv4 and use 10.10.88.0/24 for my WireGuard network.
You’ll also need to decide which UDP port WireGuard should listen to. Many network appliance out there (such as Netgate, QNAP, etc.) set UDP port 51280 as their default WireGuard listen port. But, in this article, I’ll use UDP port 51822.
Now, we have all (basic) required information for WireGuard server to run:
- Server Public IP:
xxx.xx.xx0.246 - Server Private key:
uO0GDXBc+ZH5QsLmf+qRyCtFmUV1coadJvQp8iM0mEg= - Server Public Key:
7c023YtKepRPNNKfGsP5f2H2VtfPvVptn8Hn6jjmaz8= - Server Listen Port:
UDPport51822 - WireGuard Network:
10.10.88.0/24
Create file named wg0.conf for your WireGuard configuration under /etc/wireguard directory and fill with this example configuration:
1# /etc/wireguard/wg0.conf
2
3[Interface]
4PrivateKey = <YOUR_SERVER_PRIVATE_KEY> # This example: uO0GDXBc+ZH5QsLmf+qRyCtFmUV1coadJvQp8iM0mEg=
5Address = <YOUR_SERVER_WG_IP_ADDRESS>  # This example: 10.10.88.1/24
6ListenPort = <SERVER_UDP_LISTEN_PORT>  # This example: 51822
7SaveConfig = true
Note: From the configuration above, notice that I pick
10.10.88.1as my server IP address for WireGuard network.
Replace <YOUR_SERVER_PRIVATE_KEY>, <YOUR_SERVER_IP_ADDRESS>, <SERVER_UDP_LISTEN_PORT> with your preferred configuration.
Allowing IP forward
In this article, we’ll allow this WireGuard server as our default gateway for peers (clients), so any outgoing network traffic (except to your LAN/WLAN network) can go through this WireGuard server. If you use WireGuard as peer-to-peer connection, you don’t need to do this.
Edit /etc/sysctl.conf and add net.ipv4.ip_forward=1 to the end of the file, then run sudo sysctl -p to load the new /etc/sysctl.conf values.
1sudo sysctl -p
After that, you need to add firewall rules to allow peers (clients) to connect to server and routed properly.
Setting up Firewall
By default, Ubuntu system use comes with UFW to manage system firewall. You need to add WireGuard listen port to firewall allow list.
1sudo ufw allow OpenSSH
2sudo ufw allow proto udp to any port 51822
Note that I also add OpenSSH to allow list to avoid losing connection to SSH if you didn’t configure / activate it before.
Replace 51822 to your configured WireGuard listen port.
Enable / restart your ufw service using:
1ufw enable # to enable firewall, or
2ufw reload # to reload firewall
Next, you need to know which network interface used by your server as its default route. You can use ip route list default to see that. Example output of my ip route list default command:
1default via 164.90.160.1 dev eth0 proto static
Write down the word after dev output, that’s your default network interface. We will need that information later. In this example, my default network interface is eth0.
Now add this following configuration to your /etc/wireguard/wg0.conf under [Interface] section:
1PostUp = ufw route allow in on wg0 out on eth0
2PostUp = iptables -t nat -I POSTROUTING -o eth0 -j MASQUERADE
3PreDown = ufw route delete allow in on wg0 out on eth0
4PreDown = iptables -t nat -D POSTROUTING -o eth0 -j MASQUERADE
Replace eth0 from above configuration with your server default network interface.
Your /etc/wireguard/wg0.conf should look like this:
 1# /etc/wireguard/wg0.conf
 2
 3[Interface]
 4PrivateKey = <YOUR_SERVER_PRIVATE_KEY> # This example: uO0GDXBc+ZH5QsLmf+qRyCtFmUV1coadJvQp8iM0mEg=
 5Address = <YOUR_SERVER_WG_IP_ADDRESS>  # This example: 10.10.88.1/24
 6ListenPort = <SERVER_UDP_LISTEN_PORT>  # This example: 51822
 7SaveConfig = true
 8
 9PostUp = ufw route allow in on wg0 out on eth0
10PostUp = iptables -t nat -I POSTROUTING -o eth0 -j MASQUERADE
11PreDown = ufw route delete allow in on wg0 out on eth0
12PreDown = iptables -t nat -D POSTROUTING -o eth0 -j MASQUERADE
Now our WireGuard server is ready. Try to start your WireGuard server using wg-quick (via systemd):
1sudo systemctl start [email protected]
Note that wg0 above is taken from your configuration file under /etc/wireguard directory (but without .conf file extension). If your configuration file is named internal.conf, you can start that configuration using systemctl start [email protected].
Check that your WireGuard server is running using systemctl status [email protected] command:
 1● [email protected] - WireGuard via wg-quick(8) for wg0
 2     Loaded: loaded (/lib/systemd/system/[email protected]; enabled; vendor preset: enabled)
 3     Active: active (exited) since Mon 2023-06-05 14:52:31 UTC; 2h 2min ago
 4       Docs: man:wg-quick(8)
 5             man:wg(8)
 6             https://www.wireguard.com/
 7             https://www.wireguard.com/quickstart/
 8             https://git.zx2c4.com/wireguard-tools/about/src/man/wg-quick.8
 9             https://git.zx2c4.com/wireguard-tools/about/src/man/wg.8
10    Process: 714 ExecStart=/usr/bin/wg-quick up wg0 (code=exited, status=0/SUCCESS)
11   Main PID: 714 (code=exited, status=0/SUCCESS)
12        CPU: 131ms
13
14Jun 05 14:52:30 fra1-do1 systemd[1]: Starting WireGuard via wg-quick(8) for wg0...
15Jun 05 14:52:30 fra1-do1 wg-quick[714]: [#] ip link add wg0 type wireguard
16Jun 05 14:52:30 fra1-do1 wg-quick[714]: [#] wg setconf wg0 /dev/fd/63
17Jun 05 14:52:30 fra1-do1 wg-quick[714]: [#] ip -4 address add 10.10.88.1/24 dev wg0
18Jun 05 14:52:30 fra1-do1 wg-quick[714]: [#] ip link set mtu 1420 up dev wg0
19Jun 05 14:52:31 fra1-do1 wg-quick[714]: [#] ufw route allow in on wg0 out on eth0
20Jun 05 14:52:31 fra1-do1 wg-quick[790]: Skipping adding existing rule
21Jun 05 14:52:31 fra1-do1 wg-quick[790]: Skipping adding existing rule (v6)
22Jun 05 14:52:31 fra1-do1 wg-quick[714]: [#] iptables -t nat -I POSTROUTING -o eth0 -j MASQUERADE
23Jun 05 14:52:31 fra1-do1 systemd[1]: Finished WireGuard via wg-quick(8) for wg0.

To automatically start WireGuard service when the system start, you can execute sudo systemctl enable [email protected] command.
Setup WireGuard Peer (client)
In this section, I’ll use Linux machine using wg-quick via systemd as an example to connect to our configured WireGuard server. For other method such as connecting using NetworkManager GUI, Different OS and mobile devices, you can read my next article: “Configure WireGuard VPN Clients”.
Configuring WireGuard peer (client) on Linux using systemd is almost the same as setting up WireGuard server. The different is you didn’t need to configure firewall and IP forward for peers. All you need to do is install WireGuard, create private and public key, configure DNS server you want to use, add start the service.
Generating Private and Public Key Pairs (Client Side)
If you already have your own WireGuard key pairs, you can use that keys, skip this step and go to the next step: “Configuring WireGuard Peer (client)”.
Tips: You can create vanity public key address for WireGuard using tool like warner/wireguard-vanity-address.
Generate Peer Private key
You can use wg genkey command to generate your private key. Place your private key to somewhere save, for example: /etc/wireguard/do_private.key.
1wg genkey | sudo tee /etc/wireguard/do_private.key
Write down the output, we’ll need that later to generate WireGuard peer public Key. Example of my WireGuard peer public key:
WApLrVqFvXMbvsn+62DxfQCY8rsFqmHCEFAabAeA5WY=
Change /etc/wireguard/do_private.key file permission with sudo chmod 600 /etc/wireguard/do_private.key.
Generate Peer Public Key
Generate peer public key from previously generated peer private key:
1sudo cat /etc/wireguard/do_private.key | wg pubkey | sudo tee /etc/wireguard/do_public.key
Write down the output, we’ll need that public key later to be added to our WireGuard server. Example of my WireGuard peer public key:
6gnV+QU7jG7BzwWrBbqiYpKQDGePYQunebkmvmFrxSk=
Configuring WireGuard Peer (client)
Before configuring your WireGuard peer (client), you need to decide your WireGuard private IP address for your peer connection (tunnel interface). You should use unused IP address for peer(s) from your WireGuard network IP range. In this article, 10.10.88.1/24 already used by my WireGuard server, so I can’t use that IP for peer(s). I’ll use 10.10.88.2/24 (or 10.10.88.2/32) instead.
Now, we have all (basic) required information for WireGuard peer (client) to run:
- Server Public IP:
xxx.xx.xx0.246 - Server Public Key:
7c023YtKepRPNNKfGsP5f2H2VtfPvVptn8Hn6jjmaz8= - Server Listen Port:
UDPport51822 - WireGuard Network:
10.10.88.0/24 - Client IP address:
10.10.88.2/24
Create file named wg-do1.conf for your WireGuard configuration under /etc/wireguard directory and fill with this configuration example:
 1# /etc/wireguard/wg-do1.conf
 2
 3[Interface]
 4PrivateKey = <YOUR_PEER_PRIVATE_KEY> # This example: WApLrVqFvXMbvsn+62DxfQCY8rsFqmHCEFAabAeA5WY=
 5Address = <YOUR_PEER_IP_ADDRESS>     # This example: 10.10.88.2/24
 6DNS = 1.1.1.1 8.8.8.8                # You can use any public / your own DNS resolver if you want
 7
 8[Peer]
 9PublicKey = <YOUR_SERVER_PUBLIC_KEY> # This example: 7c023YtKepRPNNKfGsP5f2H2VtfPvVptn8Hn6jjmaz8=
10AllowedIPs = 0.0.0.0/0               # Route all external traffic to here
11Endpoint = <YOUR_SERVER_PUBLIC_IP_ADDRESS>:<SERVER_UDP_LISTEN_PORT> # This example: xxx.xx.xx0.246:51822
12PersistentKeepalive = 15
Replace <YOUR_PEER_PRIVATE_KEY>, <YOUR_PEER_IP_ADDRESS>, <YOUR_SERVER_PUBLIC_KEY>, <YOUR_SERVER_PUBLIC_IP_ADDRESS>, and <SERVER_UDP_LISTEN_PORT> with yours.
Note:
AllowedIPs=0.0.0.0/0means all traffic will go through that peer (in this case, our WireGuard server).
You can specify / selective routing specific IP to specific peer (if you connected to multiple peers / servers).
For example, if you only want to route traffic to IP 1.0.0.1 and 8.8.4.4 using specific peer and use your current internet connection as default route, you can remove0.0.0.0/0and add1.0.0.1/32,8.8.4.4/32(separated by comma) toAllowedIPsvalue.PersistentKeepalive=15: How many seconds for peer send ping to the server regularly, so the server can reach the peer sitting behind NAT/firewall.DNSYou can also specify DNS servers you want to use in yourDNSconfiguration value.
Adding Peers Public Key to WireGuard Server
you need to add every peers public key to WireGuard server configuration. This need to be done to allow peers connect to our WireGuard server. There are 2 ways to do this, depending on your server configuration.
If you’re following this tutorial with SaveConfig = true in the server config, you can add peer public key by issuing this command (in WireGuard Server):
1wg set wg0 peer 6gnV+QU7jG7BzwWrBbqiYpKQDGePYQunebkmvmFrxSk= allowed-ips 10.10.88.2
Replace wg0 with your WireGuard server interface, 6gnV+QU7jG7BzwWrBbqiYpKQDGePYQunebkmvmFrxSk= with your peer public key, and 10.10.88.2 with the IP address of that will be used by that peer.
If your WireGuard server configuration doesn’t contain SaveConfig = true config, all you need to do is add peers information to your WireGuard server config (/etc/wireguard/wg0.conf). For Example:
1[Peer]
2PublicKey = 6gnV+QU7jG7BzwWrBbqiYpKQDGePYQunebkmvmFrxSk=
3AllowedIPs = 10.10.88.2/32
Replace 6gnV+QU7jG7BzwWrBbqiYpKQDGePYQunebkmvmFrxSk= with your peer public key, and 10.10.88.2 with the IP address of that will be used by that peer.
Don’t forget to restart WireGuard service every time you change /etc/wireguard/wg0.conf file.
1sudo systemctl restart [email protected]
Connecting to Server
Now, our peer (client) configuration is complete. You can try to connect your device to your WireGuard server using systemd service.
1sudo systemctl start [email protected]
Note 1:
wg-do1above is taken from your configuration file under/etc/wireguarddirectory (but without.conffile extension). If your configuration file is namedvpn-wireguard.conf, you can start that configuration usingsystemctl start [email protected].
Note 2: By default
wg-quickusesresolvconfto register new DNS entries. This will cause issues with network managers and DHCP clients that do not useresolvconf, as they will overwrite/etc/resolv.confthus removing the DNS servers added bywg-quick.
The solution is to use networking software that supportsresolvconf.
Note 3: Users of
systemd-resolvedshould make sure thatsystemd-resolvconfis installed.
To verify your configurations is properly configured, try to check your public IP from your browser or terminal using sudo wg show or curl ifconfig.me.


Conclusion
WireGuard is my favorite VPN protocol. It’s fast and less resource usage compared with other VPN protocols. It’s highly configurable and works with multiple environments. Furthermore, it can be used for peer-to-peer connection, client-server connection, or creating secure mesh network.
When combined with Nginx as reverse proxy, you can even expose your local HTTP server (and almost any services) sitting behind NAT/firewall to the internet.
Anyway, managing large scale of WireGuard network can be very difficult. But, there are a tool to help you to manage large scale WireGuard networks, such as Netmaker.


