

This article is part of WireGuard VPN series. If you haven’t read the previous series, you might be interested to set up your own WireGuard VPN server using cheap ~$6 VPS or installing WireGuard-UI to manage your WireGuard VPN server.
WireGuard was initially released for the Linux kernel, it is now cross-platform (Windows, macOS, BSD, iOS, and Android). When you buy a WireGuard VPN from VPN providers, you will usually receive a configuration file (some providers also give you QR Code image). This configuration file is all you need.
For Windows, macOS, Android, and iOS, all you have to do is import the configuration file into the official WireGuard application. For Linux who use wg-quick tool even simpler, you just have to copy the configuration file to the /etc/wireguard folder.
Even though the setup method is quite easy, I still want to write the steps on how to install or import the WireGuard configuration file here.
The WireGuard configuration file given by VPN provider (or your Sysadmins) is just a text file, will usually look like this:
 1[Interface]
 2Address = 10.10.88.5/32
 3PrivateKey = gJc2XC/D2op6Y37at6tW1Sjl8gY/O/O4Apw+MDzAZFg=
 4DNS = 1.1.1.1
 5MTU = 1450
 6
 7[Peer]
 8PublicKey = dW7TUSnRylgpo+rbNr1a55Wmg1lCBgjYnluiJhDuURI=
 9PresharedKey = Ps4+a+xQfwKFBx+yWHKF7grUP3rzilOCQDftZ5A3z08=
10AllowedIPs = 0.0.0.0/0
11Endpoint = xx.xx.xx0.246:51822
12PersistentKeepalive = 15
Parts of IP address from
[Peer] Endpointabove removed for privacy and security reason.
iPhone / iOS
Download official WireGuard client for iOS from App Store, make sure that the app comes from "WireGuard Development Team".
You can import configuration file by pressing + button from the top right of the app.
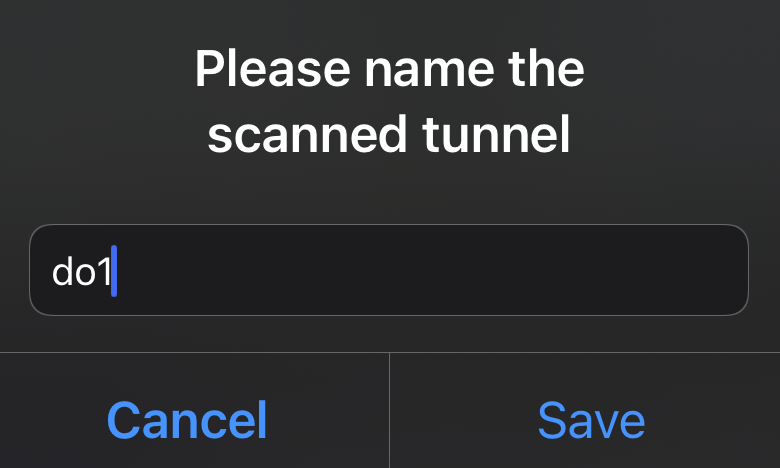
Using QR Code
- If your VPN provider gives you QR Code image for your configuration, choose “Create from QR code” and scan your WireGuard configuration QR Code.
- When promoted to enter name of the scanned tunnel (example image), fill with anything you can easily remember. Avoid using character other than
-and[a-z]. Your new VPN connection profile will be added to your WireGuard app.
Using import file or archive
- To import configuration from
.conffile, you need to download the configuration file to your device. - After configuration file is downloaded to your device, select “Create from file or archive” and pick file of your WireGuard configuration file.
Remember to avoid using character other than
-and[a-z]for the interface “name”.
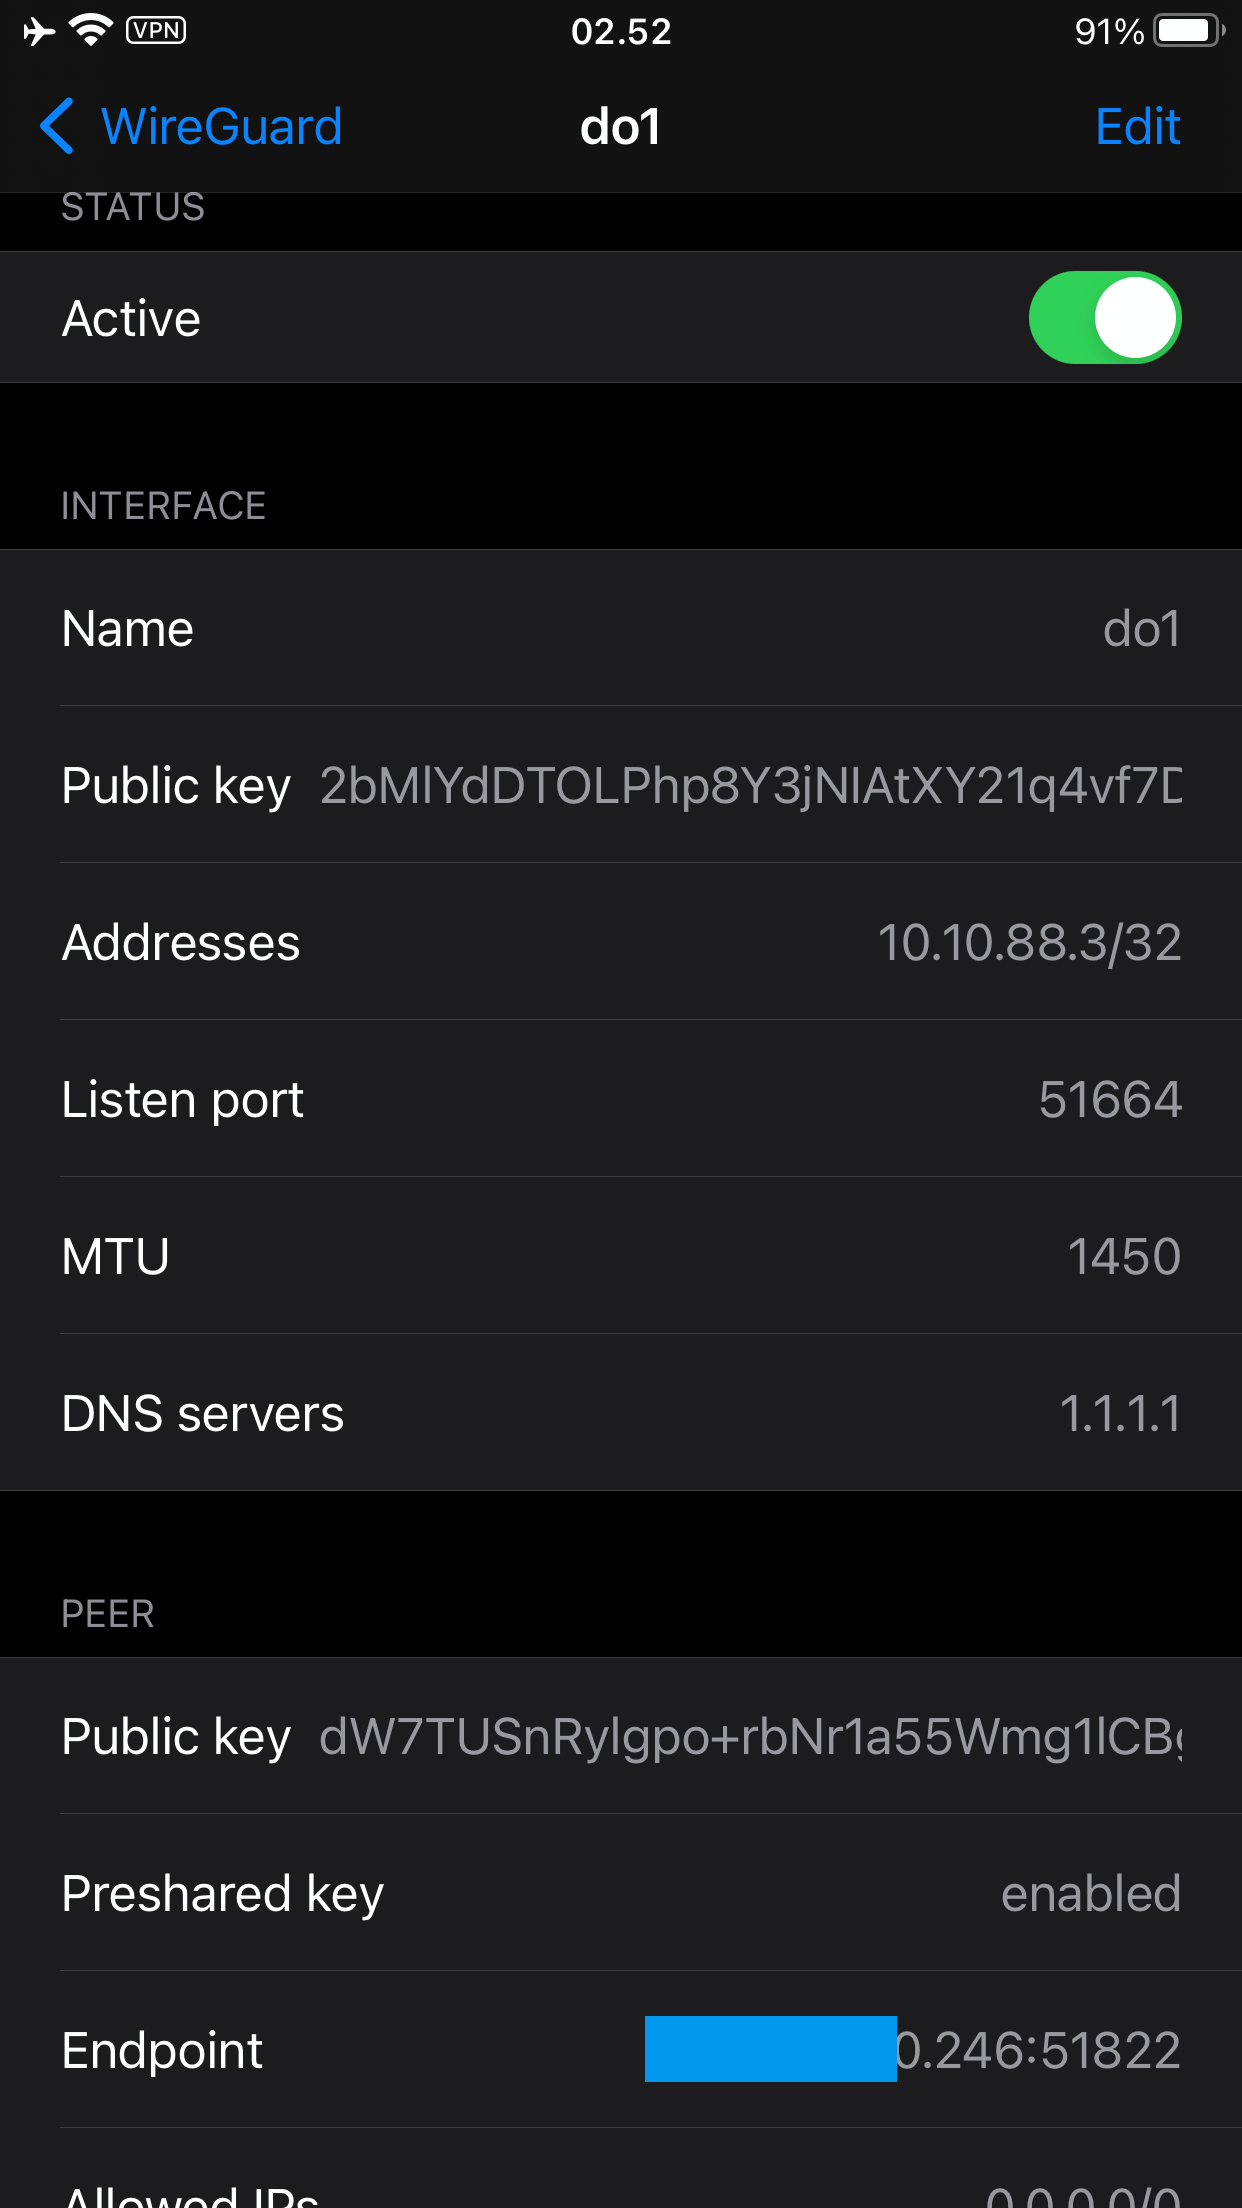
After your configuration was imported, simply tap “Active” toggle button of your desired VPN profile to on to connect [example image of connected WireGuard VPN in iOS app].
Android
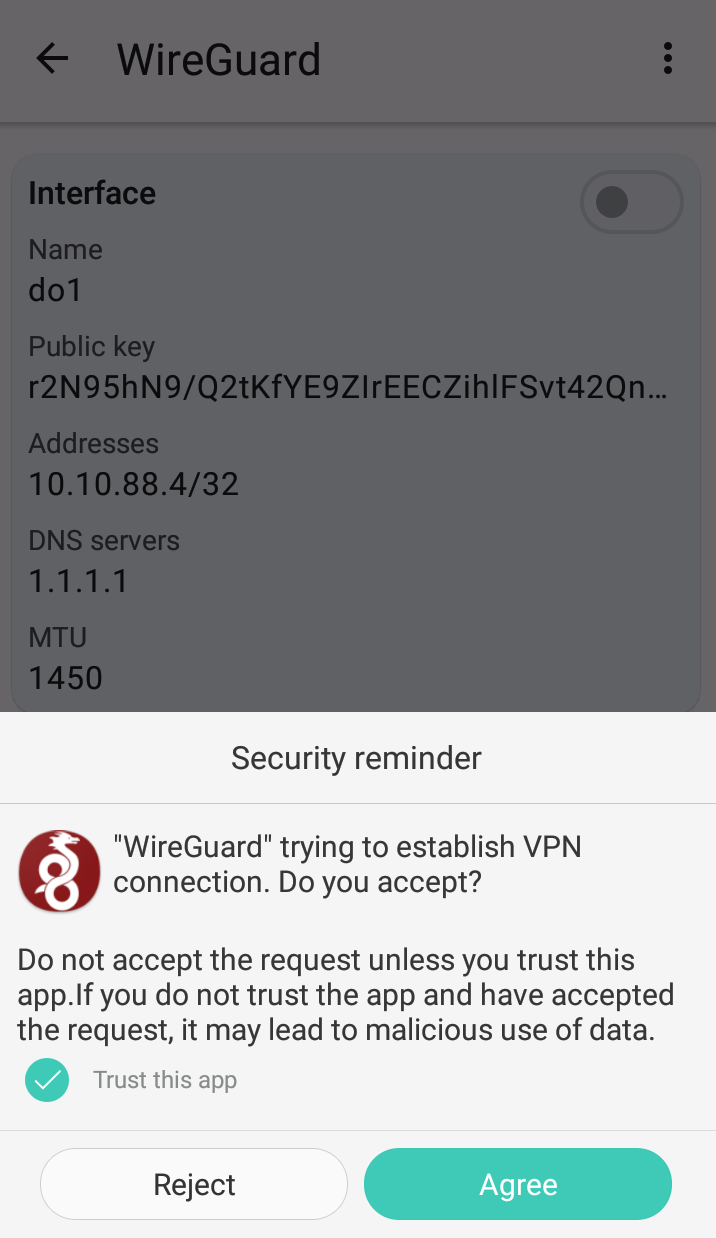
Download official WireGuard client for Android from Play Store, make sure that the app comes from "WireGuard Development Team".
You can import configuration file by pressing + button from the bottom right of the app.
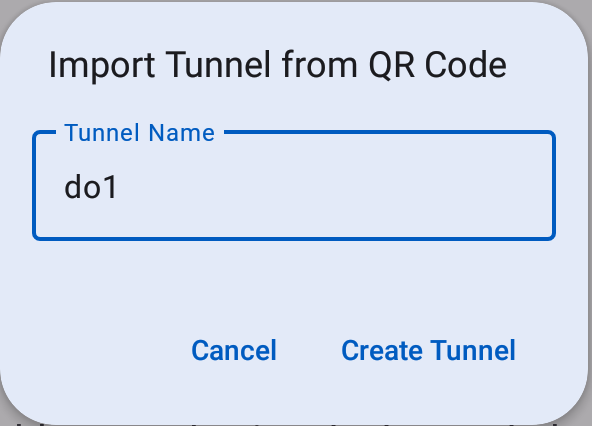
Using QR Code
- If your VPN provider gives you QR Code image for your configuration, choose “Scan from QR code” and scan your WireGuard configuration QR Code.
- When promoted to enter Tunnel Name (example image), fill with anything you can easily remember. Avoid using character other than
-and[a-z]. Your new VPN connection profile will be added to your WireGuard app.
Using import file or archive
- To import configuration from
.conffile, you need to download the configuration file to your device. - After configuration file is downloaded to your device, select “Import from file or archive” and pick file of your WireGuard configuration file.
Remember to avoid using character other than
-and[a-z]for the interface “name”.
After your configuration was imported, simply tap “Active” toggle button of your desired VPN profile to on to connect [example image of connected WireGuard VPN in Android app].
Windows and macOS
I’ll put Windows and macOS in the same section because importing WireGuard config on those OSes is pretty similar. After official WireGuard application for your OS is installed:
- Click “Add Tunnel” button (or it’s dropdown icon) and “Import tunnel(s) from file…”, then pick file of your WireGuard configuration file.
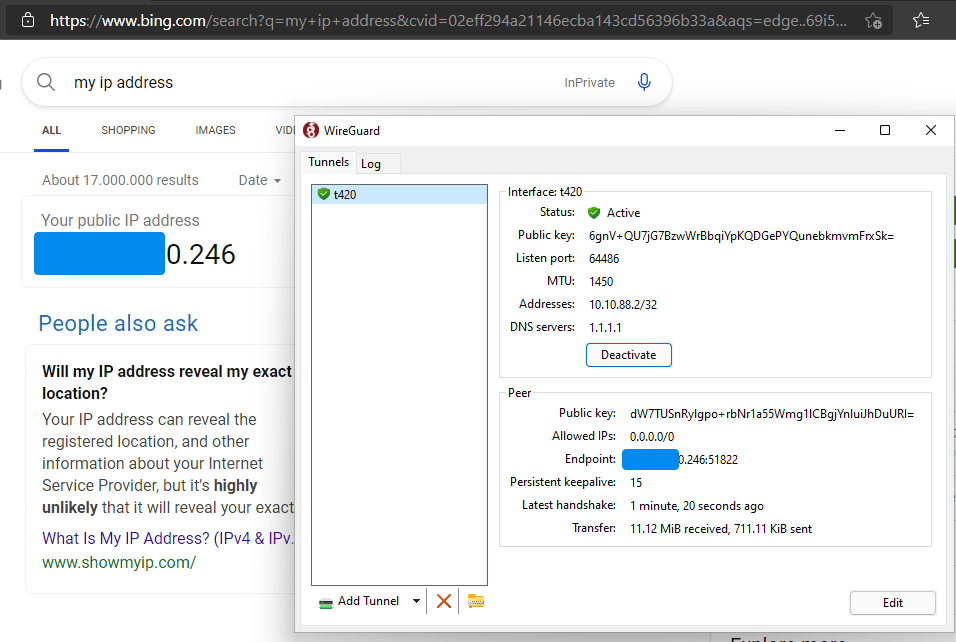
- After connected to your VPN profile, try to check your IP address. Your VPN server should appear as your public IP, not your ISP IP address.

Linux
For Linux users, you need to install wireguard package to your system. Find how to install WireGuard package from official WireGuard site or your distribution documentation page.
Using wg-quick
The easiest and simplest way to use WireGuard is using wg-quick tool that comes from wireguard package. Put your WireGuard configuration file from your VPN provider to /etc/wireguard and start WireGuard connection with:
1sudo systemctl start wg-quick@<interface-name>.service.
Replace <interface-name> above with filename (without the .conf extension) of WireGuard config given by your VPN provider.
For example, If you rename the wg0.conf to wg-do1.conf in your /etc/wireguard directory, you can connect to that VPN network using sudo systemctl start [email protected].
Try to check your WireGuard connection by check your public IP from your browser or terminal using curl ifconfig.me. If your IP address is not changed, your first command to troubleshot is sudo wg show or sudo systemctl status [email protected].
Note 1: By default
wg-quickusesresolvconfto register new DNS entries. This will cause issues with network managers and DHCP clients that do not useresolvconf, as they will overwrite/etc/resolv.confthus removing the DNS servers added bywg-quick.
The solution is to use networking software that supportsresolvconf.
Note 2: Users of
systemd-resolvedshould make sure thatsystemd-resolvconfis installed.
Using NetworkManager
NetworkManager on bleeding-edge distros such as Arch Linux has native support for setting up WireGuard interface.
Using NetworkManager TUI & GUI

You can easily configure WireGuard connection and peers using NetworkManager TUI or GUI. In this example, I’ll use NetworkManager GUI.
- Open your NetworkManager GUI, click + to add new connection.
- Choose “Import a saved VPN configuration” and pick file of your WireGuard configuration file.
- Then, you can change “Connection name” and “Interface name” to anything you can easily remember. But, avoid using character other than
-and[a-z]for “Interface name”. It won’t work if you use special character like spaces.

Using nmcli
nmcli can import a wg-quick configuration file. For example, to import WireGuard configuration from /etc/wireguard/t420.conf:
1nmcli connection import type wireguard file /etc/wireguard/t420.conf
Even though nmcli can create a WireGuard connection profile, but it does not support configuring peers.
The following examples configure WireGuard via the keyfile format .nmconnection files under /etc/NetworkManager/system-connections/ for multiple peers and specific routes:
 1[connection]
 2id=WG-<redacted>
 3uuid=<redacted-uuid-string>
 4type=wireguard
 5autoconnect=false
 6interface-name=wg-<redacted>
 7timestamp=1684607233
 8
 9[wireguard]
10private-key=<redacted_base64_encoded_private_key>
11
12[wireguard-peer.<redacted_base64_encoded_public_key>]
13endpoint=<redacted_ip_address>:<redacted_port>
14persistent-keepalive=15
15allowed-ips=0.0.0.0/0;
16
17[wireguard-peer.<redacted_base64_encoded_public_key>]
18endpoint=<redacted_ip_address>:<redacted_port>
19persistent-keepalive=15
20allowed-ips=<redacted_specific_ip_network_routes_separated_by_semicolon>
21
22[ipv4]
23address1=10.10.88.2/24
24dns=192.168.1.105;192.168.1.252;
25method=manual
26
27[ipv6]
28addr-gen-mode=stable-privacy
29method=ignore

Notes
- You can’t connect to the same VPN server from 2 or more different devices with same key. You every device MUST have its own unique key.
- For some operating system such as Windows, if you can’t import your WireGuard configuration file from your WireGuard app, make sure that your WireGuard configuration file is ended with
.conf.


